Integrate your Dynamics 365 with Azure resources using Managed Identity
Managing credentials is always a challenge but Managed Identity with Azure Active Directory is a great way to solve this problem. Not only is it a free service with Azure AD, its really easy to set up.
At the end of this post is a series of links that you can use as reference.
The preferred method of authenticating external applications with your Dynamics 365 instance would be through Server to Server authentication by:
- register your application in Azure AD
- assign the required permissions
- generate the client secret
- and then setting up the corresponding Dynamics 365 Application User
Once you have this all set up you can then connect to your instance using the above credentials created, passing in your Client Id, Client Secret and AD Tenant Id as shown below:
var clientCred = new ClientCredential(_clientId, _secret);
var authContext = new AuthenticationContext("https://login.microsoftonline.com/" + _tenantId);

return authContext.AcquireToken(_resource, clientCred).AccessToken;
Easy yes, but there is an even easier way and that is where Managed identity comes in and why not get Azure AD do all the work for you as below?
To set this up, you can do it as manually shown here or when you deploy your resources with ARM or CLI.
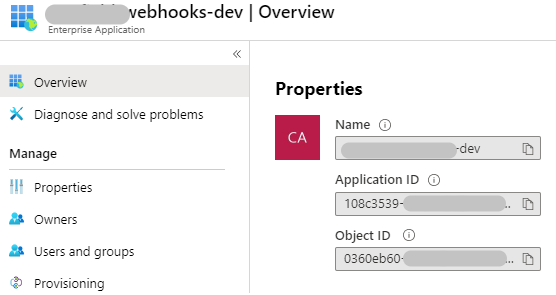
Step 1: Enable System Assigned Identity for your Azure Resource such as an Azure Function
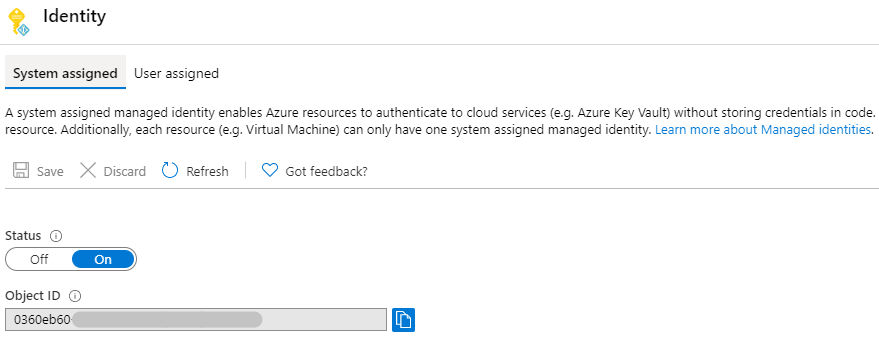
This would create a related Service Principal in the Enterprise Application blade.
note: the Application ID value
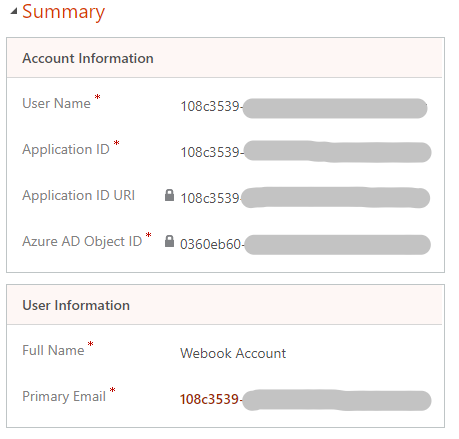
Step 2: Create the Dynamics 365 Application User and Assign a security role
Step 3: Update your code
Reference the Microsoft.Azure.Services.AppAuthentication Nuget pacakge in your project

Once this is done change your code to use the AzureServiceTokenProvider.
// Configure the token provider.
builder.Services.AddSingleton(new AzureServiceTokenProvider());
And replace the code that use the Client Id and Secret with below.
//_resource would be your Dynamics 365 instance eg. https://MyDevOrg.api.crm6.dynamics.com

return await _azureServiceTokenProvider.GetAccessTokenAsync(_resource, _tenantId);
and then consume the bearer token
using (var webProxyClient = new OrganizationWebProxyClient(GetServiceUri(), true))
{
   webProxyClient.HeaderToken = await GetD365AccessTokenAsync();
   using (var serviceContext = new XrmServiceContext(webProxyClient))
   {
....
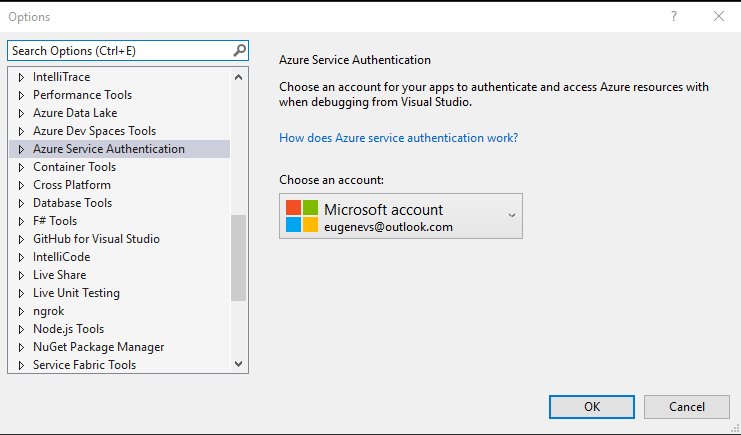
You can run and test locally in Visual Studio by updating your relevant credentials.
I hope this is of help. You can also automate the above sequence of steps as part of your deployment, which I will document in a follow up post.
For more details and thoughts, strategies and tools for ALM for the Power Platform and PowerApps Portals visit Dylan Haskins blog for more indepth details.
All of this and more is available in our PowerPlatform CICD template on Github.
Reference
https://docs.microsoft.com/en-us/azure/active-directory/managed-identities-azure-resources/overview
https://docs.microsoft.com/en-us/powerapps/developer/common-data-service/build-web-applications-server-server-s2s-authentication
https://docs.microsoft.com/en-us/power-platform/admin/create-users-assign-online-security-roles#create-an-application-user